Project Description
The Making of an Etching / Aquatint
ETCHING:
- Create a drawing that you want to transform onto a copper or lithium plate.
- Copy the drawing onto tracing paper, then flip the traced drawing. A white tracing paper is placed over the copper plate, which is covered by a black acid-resistant protective lacquer. The traced drawing is then laid over the white tracing paper and the drawing is transferred onto the plate. The back side of the copper plate is protected by a self-adhesive foil.
- With the help of an etching needle the drawing is then scratched through the black protective lacquer coat. It does not take any force. The beveled edges of the plate are also covered with protective lacquer.
- The “scratched” plate is then submerged in a dish containing azotic acid for up to 20 minutes. During this time the surface is lightly swished with a feather of a large bird to remove debris created by the acid eating into the exposed lines of the copper plate.
- The copper plate is removed and thoroughly washed under running water and defatted with a special cleaner.
- The plate is warmed up, the desired dye applied, the dye worked into the crevices created by the acid, and the rest of the surface cleaned prior to transferring the engraved drawing onto a moistened sheet of paper. The copper plate covered by a moist sheet of paper is then run through a large press. The result is the proof of the print. Any potential corrections can then be carried out.
AQUATINT:
- The plate needs first to be completely defatted with alkaline powder or solution.
- A special large box containing carbon particles is agitated and the plate placed into the box for 2-3 minutes, during which carbon particles fall onto the plate.
- The plate is removed from the box and placed on a stand. With a torch the plate is evenly heated from below until the carbon is sealed on the plate surface. This is seen as an even glare on the surface. The plate is left to cool down. Subsequently the backside of the plate is covered by a self-adhesive foil.
- The beveled edges of the plate are covered with liquid protective lacquer.
- The parts of the plate that eventually will be white, are covered by the protective lacquer. The plate subsequently submerged in the dish containing azotic acid for 2-3 minutes, removed, thoroughly washed under running water, and dried, first with soft paper towels and then with a hair dryer.
- Then the areas that need to be slightly darker are then covered with the protective lacquer, followed by submersion in azotic acid for 4-7 minutes, rinsing it under running water and drying it. These steps are once or twice repeated and submerged every time 2-3 minutes longer than the step before. Therefore the parts of the print that are the darkest were submerged in azotic acid the longest.
- The foil at the back of the plate is now removed, the plate thoroughly cleaned, heated up and covered with the selected dye. After working the dye into the crevices with folded-up sheets of old newspapers and rubbing the excessive dye off the plate, the first print can be done.
- Dependent on the result corrections can be accomplished.
- The decision is made on how many copies will be printed.
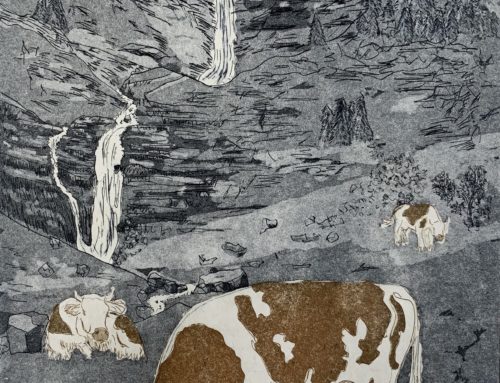
The Making of an Etching / Aquatint: DELICATE ARCH


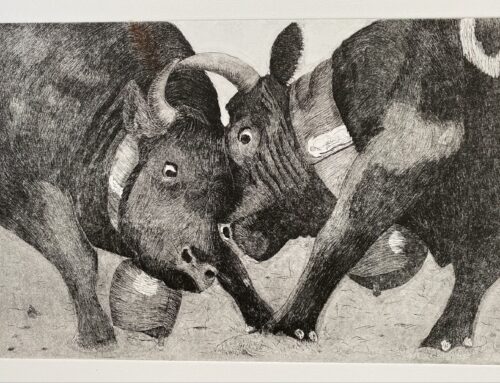
The Making of an Etching / Aquatint: DOUBLE OCCUPANCY


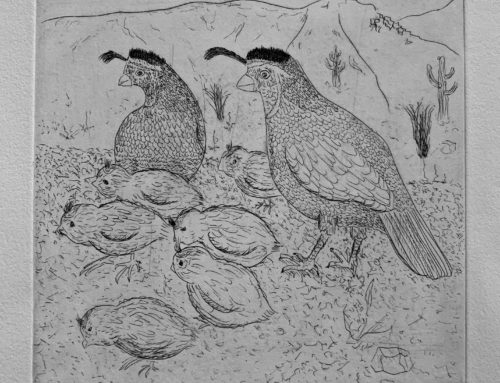
The Making of an Etching / Aquatint: ONE ROOM FOR TWO